This post is about head tracking and how to use it in 3D.
It is surprisingly easy to do with the suitable libraries.
We will experiment withheadtrackr.js andthree.js.headtrackr.js
is a nice library fromauduno to do head tracking in the browser.
You will learn how to do head tracking in webgl in only 20lines of javascript.
I love the web and how easy it is :)
As usual we did a plugin fortQuery API
to make it easy to use in our environement.
One can find 2 examples for it:
A educational example
where your heads controls a box in 3d.
For best result, make sure your face is well and evenly lighted
Another demo
where the camera follows your head.
The whole scene moves as you move your head, providing quite an immersive experience.
You can play with it thru jsfiddle too.
Let’s Get Started
Ok now lets see how to use this library withtQuery API.
First, we include the tquery.headtrackr files in your code.
tQuery plugins supportsrequire.js.
It makes dependancies much easier to handle. tquery.headtrackr is no exception, so to include it you can do
123
require(['tquery.headtrackr'],function(){// Your code ... });
Or if you use the good old <script>, do something like that
to includeheadtrackr.js itself, the library which handle the head tracking. Then you just include the plugin itself, and you are done.
First, you instanciate the object with this simple line.
You can pass various options to .createHeadtrackr(opts).
Here, opts is anObject
with those properties
opts.width : width of the image containing the face. default to 320px
opts.height : height of the image containing the face. default to 240px
opts.headtrackrOpts : options passed directly to headtrackr.js. default to {}
1
varheadTracker=tQuery.createHeadtrackr();
Default are reasonable, so chances are you dont need to specify anything. To start tracking the head on the webcam, just do the following
1
headTracker.start();
It is possible to stop it with .stop() or to reset it via .reset().
Debug View is Cool For User Feedback
If you wish enable the debugView, aka the little visualisation the headtracker result.
It gives feedback to the user on what is happening.
Thus the user can move his head accordingly or to change lighting of the room.
1
headTracker.debugView(true);
Face Position Notified thru Events
When a face is found, events are dispatched to notify the detected positions.
123
headTracker.addEventListener("found",function(event){// Your code ...});
event contains normalized coordinates of the detected face.
They use the same axis as WebGL.
If the head is on the center, event.x and event.y will be 0.
And if the head is vertical, event.angle is 0. More precisely
.x and .y : It is the center position. it varies from [-1,+1], from left to right
and bottom to top.
.width and .height: the width and height :) If it is half of whole image, it is equal to 1.
.angle: the Z rotation of the detected head. It is in radian as usual.
.headtrackrEvent: the original facetrackingEvent event fromheadtrackr.js
(seereference
)
In our case, we use the image from the webcam.
Unfortunatly face localisation from an image isn’t exactly 100% accurate to say the least :)
See here,
this is the same demo as thewii one
or theipad one.
Yet the result isn’t as convincing.
With headtrackr.js andwebrtc
, we use only the webcam in a uncontrolled environement.
So the accuracy is in consequences.
You can improve efficiency by following a few simples advices:
Avoid hats or a too crazy haircut. Being bold with a beard doesn’t help :)
Make sure your face is well and evenly lighted and you should be fine.
Conclusion
In this post, we have seen it is now possible to do head tracking in a web browser !!
Impressive if you ask me!
Even better, it is easy if you use suitable libraries. Coupled withthree.js
andtQuery API,
it is possible provide new immersive experience in20lines of javascript.
Im so excited.
This kind of things was academic research 5 years ago, and now everybody can easily use it.
We will likely do more withheadtrackr.js.
This is a very nice library with lots of possibilities.
For example, one can use it the head as a game controller, or in a artistic exposition. Stay tuned!
This post is about loading your game faster.
Appcache may be great help on this.
In this post, i will use a little game of mine called‘Marble Labyrinth’
as an example to show how i got from 2.4mbyte to 0byte of download in 5min of work.
Appcache provides faster access to your users, and less bandwidth cost to you. A well used time :)
Simple no ? Well unfortunatly even a basic har file is large.
The one for‘Marble Labyrinth’
is more than 7000 lines long. So i wrote a little tool to ease up the process
on large project.
Let’s Get Started
First, we install a little utility which gonna generate the appcache for us.
It is called har2appcache.
It is available on agithub repository as usual.
1
sudo npm install -g har2appcache
This one got the advantage to use the info from the HAR file.
So you will get all the dynamic request too. All the models that
you load with THREE.OBJMTLLoader or your textures
with THREE.ImageUtils.loadTexture are all loaded dynamically
without insertion in the DOM.
btw HAR stands for ‘HTTP Archive’.
You can read HTTP Archive specification
if you are so inclined.
To get this HAR file, we will use Chrome.
Let’s Play With Chrome Devtools
So first, you open chrome devtool, go in the network tab and reload your game.
You press right button of your mouse and you should see ‘Copy ALL as HAR’
in the popup menu.
Then you take your favorite editor,
create a file named sample.har
and paste the HAR you just copied.
This is a rather large JSON structure.
Let’s Generate This File
1
har2appcache sample.har > manifest.appcache
There you got your appcache file, rather easy no ?
You may need to edit it a bit to fit your needs,
e.g. to remove the url of dynamic content.
Now you just need to change the html tag of your page
and you are DONE!
1
<htmlmanifest='manifest.appcache'>
Smooth Workflow
Appcache is so efficient to cache that it may become hard to disable it :)
When the page load, the browser will check if manifest.appcache has changed.
If there is no update, it won’t reload what has been cached, not even the original HTML page.
It may be bothering while your develop.
Personnaly, i rename the file during developement.
With this technic, you gain a lot of time to download.
So your user got faster access and you get less bandwidth cost.
A nice win-win situation! All that in 5min top. It definitly worth it.
This post will present to you how to debug your webgl with chrome’s canvas inspection.
This is an experimental feature available in chrome devtools.
It gives you all the WebGL calls which are done in your webgl scene.
So it helps if you actually know some raw WebGL :)
In anycase you can see it being replayed call by calls, which is uber cool.
Let’s get started
As it is an experimental feature, you first need to enable it.
First let’s enable devtool experiment: enter “chrome://flags” url
in your chrome location bar. There you enable “Enable Developer Tools experiments”
and relaunch chrome.
Now that you got the Developer Tools Experiments enabled, let’s enable‘Canvas Inpection’ in particular. Click on the little gear on bottom right
of devtools. The one you can see on the right.
It will open the settings panel you see above.
Now, select experiment from the left menu, enable ‘Canvas Inpection’ and you are done.
Rather clumsy but this is an experiment after all :)
How to use it
Now that it is enabled, let’s see how to use it.
First let’s go on the “profile” tab of devtools. We can see “Capture Canvas Frame”, this is the one we gonna use.
Let’s enable it and load a page with WebGL.
As an example, i will use mmo3d. It is a multiplayer game
in webgl. It is very hackable so other people can easily do their own world. Let’s talk about
that later. For now, lets click ‘start’ and capture a frame :)
Captured frames
After that you should obtain the following. You got the actual game on the left.
and you recognise developer tools on the right.
For every frame you capture, you will get a trace log of each webgl call which has been done during this frame.
Above there is a replay window where you can actually see the scene as it is drawn step by step.
Thus you can check the order of your calls. It can be usefull when you debug transparency for example.
Watch for the draw calls, they got huge overhead and should be limited if possible.
Conclusion
As it is pure webgl, and not at three.js level, it helps if you know raw WebGL. For that, i suggest
you to read a book on the subject. Personnaly i
like“WebGL Beginner’s Guide”
byBrandon Jones.
WebGL may be complex at times, and having cool debug tools help being more efficient.
You can see the excelent paul irish doing apresentation
what you can do with canvas inspector.
Wouldn’t that be cool if we were able to mix normal web pages in our webgl? To interact with them as we usually do? to view them, to click on them… To scroll, to hover or even to type in input tags.
Oh yeah it would be so great! We, webgl people, are currently an isolated Island in the web world. Being able to mix with normal page would give us access to so much interactive content.
In this post, we gonna see how to do exactly this: how to seamlessly mix normal DOM elements in our webgl scene. They will actually appear as part of the 3d scene. Don’t worry it is surprisingly easy with three.js.
Demo of a youtube browser mixed in WebGL
First let’s see the result in action. Here is a demo I did to show all the videos I have done for this blog.Try it out!
It shows a 3d scene with a tv set and three characters sitting on grass.
The key point is on the tvset screen. This is an actual YouTube player. Not me emulating it, this is the real thing! You can access it anytime from the blog navigation bar as
you can see on the right.
Thisdemo
is pretty cool no? Now let’s see how to do this.
Let’s Get Started
DOM elements are all about flat 2d rectangles. Inthree.js
, such a thing is called aTHREE.PlaneGeometry.
So let’s try to map adom element
to aTHREE.PlaneGeometry.
Their position and rotation must match.
The goal is to make them appear as one thus the viewer can’t distinguish them.
So first, how to orientate a dom element, would you ask?
Simple we gonna use a feature introduced by HTML5, calledcss 3D transformation.
Here are some tutorialsaboutit.
css3d is done for this exact purpose, to position and rotate a DOM element in 3d.
Good News! three.js can already render things using this technology.
It is called THREE.CSS3DRenderer.
See variousexamples
ofitsusage
in three.js /examples.
Now we need to put the same plane on both renderers, WebGL Renderer and CSS3D Renderer.
Here is the code for the plane inWebGLRenderer
, wireframe with segments to see thru.
123456
// create the plane meshvarmaterial=newTHREE.MeshBasicMaterial({wireframe:true});vargeometry=newTHREE.PlaneGeometry();varplaneMesh=newTHREE.Mesh(geometry,material);// add it to the WebGL sceneglScene.add(planeMesh);
Now that we got the plane in place, here is the code for the DOM element in css 3d.
Notice how we reference the same position and rotation as the planeMesh, thus
they will move together.
12345678910
// create the dom Elementvarelement=document.createElement('img');element.src='textures/sprites/ball.png';// create the object3d for this elementvarcssObject=newTHREE.CSS3DObject(element);// we reference the same position and rotation cssObject.position=planeMesh.position;cssObject.rotation=planeMesh.rotation;// add it to the css scenecssScene.add(cssObject);
All seems to go well.
We got the same plane in css and webgl. Now we need to see the dom element behind the webgl plane.
To do this, let’s use webgl renderer and css3d renderer together on the same page.
We use stylesheet to put css renderer exactly behind the webgl one.
Thus they look the same to the viewer, as you can see on the right.
Use the following line to obtain the same result.
We are in good shape but not yet done. We still need to make both react as if they were one.
What happens if we add a torus 3d object in front of webgl plane? As you can see on the
left, it looks Ok.
What if we put this object behind it? Hmm not so good. As you can see on the right, the object
is behind the Plane,
but it is in front of the dom element. It should appear as if the torus were behind but it doesn’t.
Why’s that? It is due to the webglz-buffer.
It displays our torus because it thinks the torus is closer to the camera than the DOM element.
It’s not aware that our webgl plane should act as a see-thru to make our css3d visible.
So nothing behind our webgl plane should be displayed.
How to fix this, you would ask? We’re gonna use a tricky part of webgl: the blending.
Blending them together
What is blending ? It is the way to determine the color of a pixel when you add a
new pixel (fragment in technical terms).
So when doing blending, we use a blend function to combine the colors from both the
existing and the new fragments to make an entirely new fragment.
It is a weird beast using several WebGL calls and many equations. The total number of possibilities is scary :)
A complete explanation of blending is way out of scope of this post. For more detail, see“WebGL Beginner’s Guide”
fromBrandon Jones, a great book to start with raw WebGL.
To get a feel of blending, you can play with them inthis example.
The one which interest us is called THREE.NoBlending.
When drawing the face, it will completely ignore the color below and set it to the color of the face.
So if we put our face color to black aka (0, 0, 0) and opacity to 0, we gonna obtained what we want.
The plane will act as a see-thru to the dom element below. Here is how you initialize your material.
12345
varmaterial=newTHREE.MeshBasicMaterial();material.color.set('black')material.opacity=0;material.blending=THREE.NoBlending;// any mesh using this material will act as a see-thru to the css renderer
Then we are done ! We got a actual dom element seamlessly integrated in our webgl scene! Let’s pet our back, i think this is an important step!
HTML And WebGL Sitting Together In A Tree ?
Well, not quite unfortunatly…
WebGL is 3d inside a canvas element
and a canvas is a black box from the html page point of view.
You can’t bind DOM events inside canvas.
You can’t havestylesheet
to change canvas content.
You can’t put dom elements inside your canvas.
Those two don’t talk to each other.
Unfortunatly it isn’t all pink, WebGL and HTML aren’t really merged.
This is only a nice trick. It has some limitations.
For example, the dom element is rotated using css 3d.
This is a fairly new technology.
So you may hit bugs.
Moreover, it only appears as a part of 3d… but this remains plain DOM.
So it doesn’t benefit from webgl specific display.
For example, it is impossible to getpost processing
on the dom element.
Indeed, this technic is applied in 2d on the rendered scene and the DOM element is not in it.
Additionally the dom element won’t share the lighting as the rest of your webgl scene.
Nevertheless, css shader allows you to apply shader on normal DOM element,
so it may be possible to make a coherent lighting.
The web is so beautiful nowadays!
Conclusion
Congratulations guys! You can now mix html pages with your webgl content. You have learned how to close the gap between HTML and WebGL. It is a new way to experience and to interact with webgl 3d.
I love this new trick.
I’ve been trying to make webgl easier for while now.
My strategy has been to make it closer to what webdevs know today,
copying jQuery API on top of three.js,
emulating dom events inside webgl scene
or even making 3d text act as web links.
To integrate actual web pages inside webgl scene definitly matches this vibe!
Imagine controlling your computer without needing a mouse or a keyboard but only with the
movement of your hands! That is what the Leap motion device is all about! It was
all over the net a few months back. This device is not unlike the kinect, however it is
designed to be used at a shorter range. The leap device is a new way of motion on your
screen and it is able to trace your fingers. Quite sci-fi, don’t you think?
Especially when you see the accuracy, even the slightest movement of your fingers is tracked.
They have been nice enough to send me one so that I could play with it and get an idea of
what it does and why it is such a cool device.
Here are some applications that I found cool. You can easily install them.
Visualizer
First the Visualizer. This application is installed when you install the leap itself.
It is a basic display of what the leap detects. It helps you discover what the leap
can do and diagnose potential issues.
Flocking
Then a flocking application.
In this beautifully realized application you interact with a swarm of fishes in the deep sea.
It is computed over GPU, so you play with an impressive number of fishes.
Each of your finger tips is visualized with a nice incandescent fire.
Fishes are attracted by your fingers. But as soon as you move it you scare them away.
Just excelent!
Google Earth
Google modified its famous application Google Earth to support leap device.
Now you can fly above the earth with your hands in the air.
See the announcement for details.
LeapDJ
Then there is LeapDJ.
Leap device goes well with the music field. One can create virtual instruments and play them thru the leap.
It is instinctive and reactive. Quite fit for a musician’s state of mind :) here is leapdj demo.
You mix live music with 2 platines, sliders for volume and balance.
You can push buttons to create sounds effects. And you can do that with all your fingers at the same time.
Definitely a fun application ;)
Flying Demo
flying demo is an example where
the leap is used as a game controller.
You put your hand side to side and move them as if they were the wings of a plane.
To stay updated on what is new and interesting about developing on Leap, you may follow @LeapMotionDev on twitter
Additionnaly they haveparterships with HP
andasus PCs
to include it directly in some of their models.
With all that, we can expect this device will go beyond the geek circle and reach the masses.
For further information, you can go to the official website
How To Code It
They got an API than they have ported in multiple langages:c++,C#,Objective C,Java,Python
andjavascript.
Obviously we will focus on the javascript one :) It is called leapjs on github.
It is very simple. There is a driver running as daemon doing the work and providing you information via websocket.
I just started to code on it. I will talk more about this later.
Conclusion
So we’ve seen that the Leap motion is a very small device (less than half the size of an Iphone)
that tracks the movement of your hands and fingers.
It’s so precise it’s scary!
The Leap is very reactive and accurate, it is designed to work at a very close range.
I have tried it out and it is pretty cool.
You can move elements in your computer with your fingers, with the palm of your hand
or even by pointing them with a pen.
And good news….You can code it with javascript and you can find it on github!
We have also seen some cool applications that have been done with this device.
Trust me you don’t want to miss that so take a look at the demos!
Stay tuned for the release date and for more information about Leap Motion.
This post is about monitoring rendering performance within three.js.
It presents a small standalone extension called threex.rendererstats.
It collect information from three.js renderer and display it live.
It is very usefull to diagnose performance issues while developping.
The API is exactly the same as stats.js
so it is easy for you to include in your own stuff.
What Is It ?
threex.rendererstats collects information
about three.js renderer and display it realtime on your screen.
It is released under MIT license and is available ongithub.
See a screenshot on the right.
It is inpired fromstats.js bymrdoob.
See a screenshot on the left.
Webgl renderer keeps some internal statistics on the scene being renderered and update it at every frame.
It is accessible in a property .info.
threex.rendererstats just gather this information and display it nicely on your screen.
How Is It Useful ?
It is a very nice tool to monitor performances of WebGL rendering.
As it is updated realtime, you can identify performance issues at various moments within your game
We have seen canvas inspection recently inDebugging With Chrome’s Canvas Inspection.canvas inspection
is directly at webgl level. threex.rendererstats remains at three.js level to give you another kind
of information on the renderer.
Lets details those information
There is 2 sections one for the memory, another for the renderer.
For the memory, you got
info.memory.geometry : number of geometry currently in memory
info.memory.programs : number of shaders currently in memory
info.memory.texture : number of texture currently in memory
For the render, you got
info.render.calls : number of draw calls currently used to render
info.render.vertices : number of vertices currently rendered
info.render.faces : number of triangles currently renderered
info.render.points : number of particles currently rendered
How To Use It ?
first, include threex.rendererstats.js with the usual <script> tag.
1
<script src='threex.rendererstats.js'></script>
then you initialize the object.
1
varrendererStats=newTHREEx.RendererStats()
You likely need to position it on the page with css.
You may use something along this line
finally you update it at every frame in your rendering loop or when you do renderer.render()
1
rendererStats.update(renderer);
And you are done. Quite easy to include! Now you can monitor your own three.js scenes.
Conclusion
We have seen how to monitor performance information withing three.js.
How to display and use the statistics collected by THREE.WebGLRenderer
itself.
The information may appear a bit raw but it is live.
So unexpected performance changes can be detected very early.
This post explains how to code“city”
, a demo recently released by@mrdoob.
He built a fully procedural city in 100-lines of javascript.
I found the algorithm very elegant, a simple and efficient solution.
So I made a post explaining it.
A Few Remarks on the Algorithm
It always helps to get a big picture before going down to the details.
The used algorithm is fully procedural.
This means the whole city is built dynamically, so no download.
It is quite elegant as well.
The algorithm to generate the city in 3d is less than 100 lines long.
What is this algo in a nutshell?
Every building is a cube, they got random size and position.
Simple enough ?
It may seem far from realism but it is ok.
The illusion is surprisingly convincing if you fly over at low altitude.
From a performance point of view, all buildings are merged into a single geometry,
with a single material.
As a cherry on the cake, we remove the bottom face as it is never seen.
It is very efficient as there is no shader swap and a single draw call.
To improve realism, we simulate ambient occlusion thru a cheap trick
using vertexColor.
In the city, at the street level you got shadow from the other buildings.
So the bottom of the buildings are darker than the top.
We can reproduce this effect with vertexColor.
We take the bottom vertices of the building and make them darker than the top.
Let’s get started
To explain those 100 lines, we will explain it step by step:
First, we “generate the base geometry for the building”.
Then we use this geometry to know “where to place buildings in the city”.
We use some clever trick “using vertexColor for ambient occlusion”.
Then we “merge all buildings to make a city”, thus the whole city may
be drawn in a single draw call.
At the end we detail the “procedural generation of building’s texture”.
Ok so let’s get started!!
Generate the base Geometry for the building
We build a base geometry of our building.
It will be reused several time while building the whole city.
So we build a simple CubeGeometry
1
vargeometry=newTHREE.CubeGeometry(1,1,1);
We change the pivot point to be at the bottom of the cube, instead of its center.
So we translate the whole geometry.
Then we remove the bottom face.
This is an optimisation.
The bottom face of a building is never seen by the viewer as it is always on the ground.
It is useless and we remove it.
1
geometry.faces.splice(3,1);
Now we fix the UV mapping for the roof face.
We set them to the single coordinate (0,0).
So the roof will be the same color as a floor row.
As each face of the building is using a single texture, it can be drawn in a single draw call.
Sweet trick for optimisation.
Ok now that we got the geometry of a single building, let’s assemble buildings together to make a city!
Where to place buildings in the city
Well… to be honest we put them anywhere.
All is random ;)
Obviously, there are collisions but the illusion is nice if you fly at low altitude.
So first, we put the building at random position.
We got the position/rotation/scale of our building all set.
Now let’s set its color, and how to use it to simulate shadows.
Using VertexColor for Ambient Occlusion
In a city with lots of buildings, the bottom of the building tends to be darker than the top.
This is because the sun light hits the top harder than the bottom, at the bottom you have the shadow of another building.
This is what we callambient occlusion in graphic programming.
This concept may be implemented in various ways:
for example in screen space with screen space ambient occlusion or ssao
or in thisminecraft example from three.js
With three.js, it is is possible to assign a color to a vertice.
It will alter the final color of the face.
We gonna use that to simulate shadows at the bottom of building.
First we define the base colors for the part which receives lights, and the ones
which get shadows.
Now we need to assign the .vertexColor every vertex of every face.
If the face is a top face, we use baseColor of the building.
If it is a side face, we use baseColor multiplied by our light
for the top vertices and shaddow for the bottom vertices,
as cheap ambient occlusion.
1234567891011121314
// set topColor/bottom vertexColors as adjustement of baseColorvartopColor=baseColor.clone().multiply(light);varbottomColor=baseColor.clone().multiply(shadow);// set .vertexColors for each facevargeometry=buildingMesh.geometry;for(varj=0,jl=geometry.faces.length;j<jl;j++){if(j===2){// set face.vertexColors on root facegeometry.faces[j].vertexColors=[baseColor,baseColor,baseColor,baseColor];}else{// set face.vertexColors on sides facesgeometry.faces[j].vertexColors=[topColor,bottomColor,bottomColor,topColor];}}
We got a single building fully setup. Now let’s make a city with many buildings.
Merge all buildings to make a city
To make our city, we gonna merge 20000 buildings together.
So we gonna loop and apply the above formulas for each building we add.
We have already seen that reducing draw calls is good for performance.
see “Performance: Merging Geometry” post.
Here all buildings share the same material, so we gonna merge them all
in a single geometry.
12345678
varcityGeometry=newTHREE.Geometry();for(vari=0;i<20000;i++){// set the position/rotation/color the building in the city// ... // merge it with cityGeometry - very important for performanceTHREE.GeometryUtils.merge(cityGeometry,buildingMesh);}
Now we got a single large geometry for the whole city, let’s build
a mesh from it.
123456
// build the meshvarmaterial=newTHREE.MeshLambertMaterial({map:texture,vertexColors:THREE.VertexColors});varmesh=newTHREE.Mesh(cityGeometry,material);
This mesh is a whole city.
Rather cool!
Now one last step, let’s explain how to make this texture.
Procedural Generation of Building’s Texture
Here we want to generate the texture for the side of each building.
In a nutshell, it will show the floors for realism and variety.
So it alternates between row of window and row of floor.
Window rows are dark with a small noise to simulate light variations in each room.
Then we upscale texture carefully avoiding filtering.
Now we need to draw on this white surface. We gonna draw floors on it.
one windows row, then a floor row and we loop.
In fact, as the face is already white, we just have to draw the window rows.
To draw the window row, we add some random to simulate lights variations in each windows.
Now we got the texture… just it is super small, 32, 64
We need to increase its resolution. But lets be careful.
By default when you increase the resolution, you get a smoothed result, so it may easily appears blurry.
See on the right side, it doesn’t look good…
To avoid this artefact, we disable .imageSmoothedEnabled on each plateform.
You can see the result on the left.
The blurry effect is no more.
It is as sharp as the original but with a better resolution.
Ok now lets code exactly that. First we create the large canvas of 1024 by 512.
Then all we need to do is to actually build the THREE.Texture.
We set the anisotropie to a high number to get better result.
see tojiro on anisotropy for detail.
This was the last step. Now, you know how to do a procedural city
in webgl with three.js. Rather cool!
As a summary here is the whole code put together.
The Whole Code
Let’s put all that together. Here is the whole code commented.
// build the base geometry for each buildingvargeometry=newTHREE.CubeGeometry(1,1,1);// translate the geometry to place the pivot point at the bottom instead of the centergeometry.applyMatrix(newTHREE.Matrix4().makeTranslation(0,0.5,0));// get rid of the bottom face - it is never seengeometry.faces.splice(3,1);geometry.faceVertexUvs[0].splice(3,1);// change UVs for the top face// - it is the roof so it wont use the same texture as the side of the building// - set the UVs to the single coordinate 0,0. so the roof will be the same color// as a floor row.geometry.faceVertexUvs[0][2][0].set(0,0);geometry.faceVertexUvs[0][2][1].set(0,0);geometry.faceVertexUvs[0][2][2].set(0,0);geometry.faceVertexUvs[0][2][3].set(0,0);// buildMeshvarbuildingMesh=newTHREE.Mesh(geometry);// base colors for vertexColors. light is for vertices at the top, shaddow is for the ones at the bottomvarlight=newTHREE.Color(0xffffff)varshadow=newTHREE.Color(0x303050)varcityGeometry=newTHREE.Geometry();for(vari=0;i<20000;i++){// put a random positionbuildingMesh.position.x=Math.floor(Math.random()*200-100)*10;buildingMesh.position.z=Math.floor(Math.random()*200-100)*10;// put a random rotationbuildingMesh.rotation.y=Math.random()*Math.PI*2;// put a random scalebuildingMesh.scale.x=Math.random()*Math.random()*Math.random()*Math.random()*50+10;buildingMesh.scale.y=(Math.random()*Math.random()*Math.random()*buildingMesh.scale.x)*8+8;buildingMesh.scale.z=buildingMesh.scale.x// establish the base color for the buildingMeshvarvalue=1-Math.random()*Math.random();varbaseColor=newTHREE.Color().setRGB(value+Math.random()*0.1,value,value+Math.random()*0.1);// set topColor/bottom vertexColors as adjustement of baseColorvartopColor=baseColor.clone().multiply(light);varbottomColor=baseColor.clone().multiply(shadow);// set .vertexColors for each facevargeometry=buildingMesh.geometry;for(varj=0,jl=geometry.faces.length;j<jl;j++){if(j===2){// set face.vertexColors on root facegeometry.faces[j].vertexColors=[baseColor,baseColor,baseColor,baseColor];}else{// set face.vertexColors on sides facesgeometry.faces[j].vertexColors=[topColor,bottomColor,bottomColor,topColor];}}// merge it with cityGeometry - very important for performanceTHREE.GeometryUtils.merge(cityGeometry,buildingMesh);}// generate the texturevartexture=newTHREE.Texture(generateTexture());texture.anisotropy=renderer.getMaxAnisotropy();texture.needsUpdate=true;// build the meshvarmaterial=newTHREE.MeshLambertMaterial({map:texture,vertexColors:THREE.VertexColors});varcityMesh=newTHREE.Mesh(cityGeometry,material);functiongenerateTexture(){// build a small canvas 32x64 and paint it in whitevarcanvas=document.createElement('canvas');canvas.width=32;canvas.height=64;varcontext=canvas.getContext('2d');// plain it in whitecontext.fillStyle='#ffffff';context.fillRect(0,0,32,64);// draw the window rows - with a small noise to simulate light variations in each roomfor(vary=2;y<64;y+=2){for(varx=0;x<32;x+=2){varvalue=Math.floor(Math.random()*64);context.fillStyle='rgb('+[value,value,value].join(',')+')';context.fillRect(x,y,2,1);}}// build a bigger canvas and copy the small one in it// This is a trick to upscale the texture without filteringvarcanvas2=document.createElement('canvas');canvas2.width=512;canvas2.height=1024;varcontext=canvas2.getContext('2d');// disable smoothingcontext.imageSmoothingEnabled=false;context.webkitImageSmoothingEnabled=false;context.mozImageSmoothingEnabled=false;// then draw the imagecontext.drawImage(canvas,0,0,canvas2.width,canvas2.height);// return the just built canvas2returncanvas2;}
threex.proceduralcity extension
As usual, this code is gathered in easy-to-reuse threex package,threex.proceduralcity.
It makes stuff super simple, just create an instance and it will return a THREE.Mesh.
12
varcity=newTHREEx.ProceduralCity()scene.add(city)
The demo live
contains this city plus a ground, a first person control and a fog.
This is rather cool result for such a small effort.
Conclusion
So now you know how to generate a whole city in 100 lines.
No download.
Rather clever algorithm.
I hope you learned from it,
it contains many tricks that you can reused in your own demos.
So today we gonna learn how to display the earth in webgl.
That will be a nice introduction to material and textures.
I got the idea while codingthreex.planets,
a three.js extension to easily display all the planets from the solar system based onplanetpixelemporium. With this post, you will be able to feel like astronauts conquering the outer space for the day and creating your own galaxy. :)
So we want to render the earth with three.js… It is surprisingly easy to code.
We gonna use the textures
fromplanetpixelemporium
and proceed step by step.
But first let me show you thedemo we gonna write below.
First the geometry with a sphere, then each texture and their various effects.
We will even add animations to make it more realistic and put it in context with
a star field background.
Let’s Do a Plain Sphere
Well we first create a geometry for the sphere, then
we add a phong material,
create a mesh from them
and add it to the scene.
The first parameter, 0.5 is the radius.
The second parameter, 32, is the segments in width
and
the third, 32, is the segments in height.
We make it quite detailed for it to be nicer.
We pick THREE.MeshPhongMaterial to getphong shading.
It provides specular reflection
which will be used to get a shiny sea.
Cool but rather flat… What about a diffuse texture to add some colors to our sphere.
Let’s Add a Diffuse Texture
Above you can see thediffuse texture
fromplanetpixelemporium to set the main color
of the surface.
When we apply it to a sphere, we get the image on the right.
Here is the code to produce it.
Hmm rather cool but more relief on the earth would be cool. What about a bump texture now ?
Let’s Add a Bump Texture
Above is the bump map we use.
According to wikipedia definition,
a bump map “perturbates the surface normals of the object
using the perturbed normal during lighting calculations”.
Each of its pixels acts as a height on the surface.
See the result on the right.
The mountains appear more clearly thanks to their shadow.
It is possible to change how much the map affects lighting with bumpScale parameter.
Play with it to fit your needs. Now that we change the heights on various parts of the
earth, let’s change its shininess with a specular texture.
Let’s Add a Specular Texture
Above is the specular map we use.
Each pixel determines the intensity ofspecularity.
In this case, only the sea is specular because water reflects water more than earth.
You can see it on the left with the white halo in the Gulf of Mexico.
You can control the specular color with .specular parameter.
Yeah but all this water, where does it go when it is hot ? It evaporates in the sky
and becomes clouds.
Let’s Add a Cloud Layer
We build canvasCloud and use it as texture.
It is based on the jpg images you see above:
one for the color and the other for the transparency.
We do that becausejpg
doesn’t handle an alpha channel.
So you need to make the code to build the texture based on those images.
We attach the cloudMesh to the earthMesh, thus they will move together.
Notice the parameters of the material.
We disable depthWrite and set transparent to warn three.js the
cloud mesh is transparent.
We set side to DoubleSide thus both sides will be visible.
This avoids artefacts to be on the edge of the earth.
Finaly we set opacity to make them more translucide.
The output is quite convincing but rather static. Let’s see what we can do about that!
“And Yet it Moves”
This is whatGalileo Galilei said
about the earth. This sentence has ainteresting story.
So i am thinking it would be cool to make our earth move too.
In your render loop, you simply do this
Definitely better, but still we feel there is something missing.
What do we see in space ? Stars! duh :)
Let’s Add a Star Field
We will see how to render the galaxy starfield.
The star field as you see it in the demo is an “environment sphere”,
aka it is a large sphere, we are in the center and we see what’s inside.
So we ask three.js to show the backside of the faces.
And we use the texture above as diffuse.
The above image is smaller than the actual one so you barely see the stars.
12345678
// create the geometry spherevargeometry=newTHREE.SphereGeometry(90,32,32)// create the material, using a texture of startfieldvarmaterial=newTHREE.MeshBasicMaterial()material.map=THREE.ImageUtils.loadTexture('images/galaxy_starfield.png')material.side=THREE.BackSide// create the mesh based on geometry and materialvarmesh=newTHREE.Mesh(geometry,material)
threex.planets - All Solar System’s Planets Done For You
While i was at it, i madethreex.planets,
athreex
extension forthree.js.
It provides all the planets from the solar system to be easily usable in your own demo or games.
It is based onplanetpixelemporium
textures using the same technics described in this post.
You can see it livehere.
First, the mythicalsun,mercury andvenus.
Now the best known, theearth
with its cloud that we previously detailed in this post, themoon
which isn’t
an actual planet but still we could not do without, andmars
with the little green people.
Follow,jupiter,saturn anduranus.
I love the rings there. I added shadow casting to enhance realism.
And the last two, the furthest ones,neptune
andpluto
Conclusion
In this post, we saw how to make a nice looking earth with animated clouds with a star field in
the background. I think it is a nice result for the amount of work.
I hope it was useful to discuver the various roles of textures.
Now you can use this to make even nicer demos, likethis one.
It shows the same Earth, that we just saw how to do, with the moon close to it.
We add shadow casting and a nice atmosphere shader and the result is quite convincing.
So, today we are gonna learn how to use Yeoman forthree.js.
We are gonna create a Nyancat in WebGL, starting from nothing in only 30 seconds.
It was a challenge to see how fast we could reach using the yeoman tools.
Here is thedemo
we gonna build in 30 seconds :)
You are gonna see how easy it is through a talk i made atparisjs!
But first… what is yeoman? Well,yeoman
is a “Modern Workflow for WebApps”.
It is composed of 3 tools:bower, grunt and yo.
Let’s see howyeoman
will help us ease up and speed up the work when we’re doing
three.js.
You can look at thescreencast
of me doing the talk, or directly at theslides below.
If you are in a rush, here is the TL;DR executive summary. Have Fun :)
In this post, we are going to present how to do a mini-game called “Flying Spaceships”.
We are going to do it together in 40 minutes.
You can read the slides or watch the video to follow along!
Just look at this demo.
It uses three.js for the 3D,WebAudio API
for the sound and several threex extensions
for stuff like spaceships and planets.
I love the fact that now we can code mini-games in less than an hour!
All that on the web, and with open source, so cool!
The Talk
Here is the promised 40min video. Sit back and relax :)
The Slides
Here are a screenshot of every slides.
Or you can directly look at theslides.
You don’t look at your best, but you don’t remember the morning after, lucky you. So now you are sober, this demo will show you how you look when you are drunk…
Hopefully this will make you realize that alcohol abuse is a bad thing! And that we couldsave the world by stopping it!
Or it will just show some cool webgl effects… Honnestly i wasnt that sure of its exact purpose. Well, up to you to pick :)
In other words, this is a webgl demo which reads your webcam, to show yourself on screen, then it does some screen deformations to give you an idea of what you look like when you are drunk.
We will learn how to code that. So first the tools of the trade…
handles videos in texture. It is possible to put html5 video output in texture, even put the webcam in it, or to connect it to WebAudio API to get localized sounds.
an intoxicated post-processing effect. You can easily add it in your game to simulate the player is drunk. It provides various levels: sober, drunk, high and wasted.
We will use it to deform the video from the webcam and makes you look drunk.
Webcam For Texture
So the first thing is to get webcam on fullpage.
For that we use threex.videotexture.
It does video textures, either you take this video from a url, like this.
1234567
// create the videoTexturevar videoUrl = 'sintel.ogv';var videoTexture= new THREEx.VideoTexture(videoUrl)// on every render, update itonRenderFcts.push(function(delta, now){ videoTexture.update(delta, now)})
Or you take the video live from the webcam, like this.
123456
// create the webcamTexturevar videoTexture = new THREEx.WebcamTexture()// on every render, update itonRenderFcts.push(function(delta, now){ videoTexture.update(delta, now)})
Then use videoTexture.texture in your materials to
have the texture of the webcam. So let’s see how we will
compose our scene.
Scene Composition
We need a Plane which take the full page, and we will apply our webcam texture to it.
So first there is an orthographic camera. Perspective is useless in this case, and make computations much more complex :)
12
var camera = new THREE.OrthographicCamera(window.innerWidth / -2, window.innerWidth / 2 , window.innerHeight / 2, window.innerHeight / -2, -100, 100);
Then, there is a THREE.PlaneGeometry mesh
using full screen for this camera.
1234
var geometry = new THREE.PlaneGeometry( window.innerWidth, window.innerHeight )var material = new THREE.MeshBasicMaterial();var mesh = new THREE.Mesh(geometry, material)scene.add(mesh)
Then we apply our videoTexture to this material. Thus
we see the webcam on this plan :)
1
material.map = videoTexture.texture
So we got our face on full screen, cool for ego i guess :)
Now let’s apply some deformation to it!
Post Processing and Rendering
Usually to render a scene, we use the following code.
This is when we render the scene directly on screen.
1
renderer.render( scene, camera )
We will use a post processing chain with THREE.EffectComposer. It process the screen as a 2d texture.
More specifically, we will use threex.toxicpproc, a three.js extension which provide post processing of drunk effects. It got 4 presets sober, drunk, high and wasted. There is a nice tweening when you switch between presets so transitions looks smooth.
Try it yourself in this demo.
THREEx.ToxicPproc
So First lets instanciate a THREEx.ToxicPproc.Passes. It will setup the effect composers passes for our effect. We set it to the drunk preset.
12345
var toxicPasses = new THREEx.ToxicPproc.Passes('drunk')// on every render you update itonRenderFcts.push(function(delta, now){ toxicPasses.update(delta, now)})
If you want to create other presets, it is entirely possible. There is even a Dat.GUI provided for you to tweak buttons until it fits your needs. You see it in the demo.
You use it like this.
12
var datGui = new dat.GUI()THREEx.addToxicPasses2DatGui(toxicPasses, datGui)
THREE.EffectComposer
Now that we got the toxicpproc passes, let’s create the THREE.EffectComposer to run it.
1
var composer = new THREE.EffectComposer(renderer);
We render the scene on a texture
12
var renderPass = new THREE.RenderPass( scene, camera );composer.addPass( renderPass );
We send this texture to threex.toxicpproc
1
toxicPasses.addPassesTo(composer)
Now we just have to tell the composer the last pass is the one to be rendered on screen.
We got the rendering to do on each frame. Usually we do
1
renderer.render( scene, camera )
But here we render thru the effect composer, so we do
12
// render thru composercomposer.render(delta)
Conclusion
Ok so you have learn how to code a demo like“Have you seen yourself When you are Drunk ?”
Pretty Cool!
Now you can get more threex extensions and
play with it to build your own demos.
This is All for Today Folks, have fun! :)
Hello everybody! I’m working on a new project that I want to share with you. But first, let me start by telling you what inspired me to do it.
Last week, I read an interesting article written by John Resig called Write code everyday. He explains how he succeed in efficiently accomplishing his side projects. This article opened my eyes. It was like a revelation, a procedure that I just had to apply to my own work. An answer to the questions I had been asking myself: How could I be more efficient? How could I be more disciplined and improve my execution?
The tactic that Resig decided to practice to improve his productivity was quite simple: He tried working on his side projects a little everyday, for a delimited amount of time, and it worked! He didn’t feel like a failure when he didn’t do enough “quality” work during the weekend anymore! He found a way to organize his schedule, do his work, while still devoting time to leisure activities. I find this amazingly intelligent!
Resig’s work inspired me. So, I wanna try to do something similar: I want to publish a three.js game extension every day! Yes I know, it’s a challenge! But I wanna see if Resig’s tactic helps me gain more discipline when publishing my code. The idea is to publish one every day of the week, from Monday to Friday, one per day for two months, except on the weekends, because well, one has to rest at some point :)
Ok, so you already know that I love three.js, a javascript 3D library that makes Webgl. Three.js is the new up and coming technology, it’s hot, cutting-edge, and it has been deployed worldwide. Well, now I would really love to help you write your own games with it! I think the best way to do this is by publishing one three.js game extension per day. I have an enormous amount of information, and code, to share with you. I just have to get it out there for you to see!
Three.js Game extensions will make the dream of developing your own 3d video game come true. My moto is “One threex per day, gets your game on it’s way!” I’ve got over 40 cool extensions that could be used to facilitate the development of 3D games on the web. And I wanna share this knowledge with the world!
Most of the three.js game extensions that I will publish support require.js and it would be very easy to add them to your own game. With these extensions you can actually learn to code 3D mini-games in less than an hour, like Flying Spaceships or to create more detailed video games with a lot of cool post-processing effects, like Stellar7. Just to give you an idea, I coded Stellar7 in only 2 weeks thanks to threex extensions! That’s a record :)
The three.js game extensions will teach you real skills and tools to help you develop cool stuff on 3D. The best part is that you can reproduce everything you learn cause it’s all open source and available to anyone!
The Three.Js Games mission is to ignite the spark of genius creativity that every developer has.
This is post is part of the ‘one threex a day’ challenge.
This challenge is to publish every day one game extension for three.js!
One per day, every day and that for 2month!
In this post, we gonna talk aboutthreex.crates.
threex.crates is a threex game extension for three.js.
It provides crates models, 3 of them to be accurate.
Yeah you heard me, this is only boxes of wood. Why doing an extension for that?
Well, because crates are like a myth in 3d graphics, we put them everywhere.
So if you need crates to easily put in your game, you know where to find them now :)
This is post is part of the ‘one threex a day’ challenge. This challenge is to publish every day one game extension for three.js! One per day, every day and that for 2month! In this post, we gonna talk about threex.oimo.
threex.oimo is a threex game extension for three.js. It provides a realistic physics easy to include in your own games. So you can take objects in your game and make them fall as if it was the real world! You can code a pool game in a day!
You make rocks fall from the sky in a realistic fashion! Sky is the limit!
It is a warper over the excelent library oimo.js physics library. lo-th, the author does a lot of crazy things! Be sure to check it out!
Well first you need to create a oimo.js world. You do that like this
1
var world = new OIMO.World()
Then, at every frame, update your mesh position/rotation.
1
world.step()
Then you need to create physics bodies and make them move
.createBodyFromMesh()
It will create the IOMO.Body from a three.js mesh you give it.
Currently it support THREE.CubeGeometry and THREE.SphereGeometry. First create a normal THREE.Mesh
1234
var geometry = new THREE.CubeGeometry(1,1,1)var material = new THREE.MeshNormalMaterial()var mesh = new THREE.Mesh( geometry, material )scene.add(mesh)
Then you create the IOMO.Body for it
1
var body = THREEx.Iomo.createBodyFromMesh(world, mesh)
.Body2MeshUpdater()
It will update the position/rotation of a THREE.Mesh
based on a position/rotation of a IOMO.Body. You need
this to see your meshes moves according to oimo.js physics.
First you create the object
1
var updater = new THREEx.Iomo.Body2MeshUpdater(body, mesh)
Then, at every frame, update your mesh position/rotation.
1
updater.update()
.Stats()
It will display statistic from oimo.js, it may be useful to know what is going on.
It acts very much likemrdoob’s stats
orthreex.rendererstats.
12
var oimoStats = new THREEx.Iomo.Stats(world)document.body.appendChild(oimoStats.domElement)
This is post is part of the ‘one threex a day’ challenge.
This challenge is to publish every day one game extension for three.js!
One per day, every day and that for 2month!
In this post, we gonna talk aboutthreex.laser.
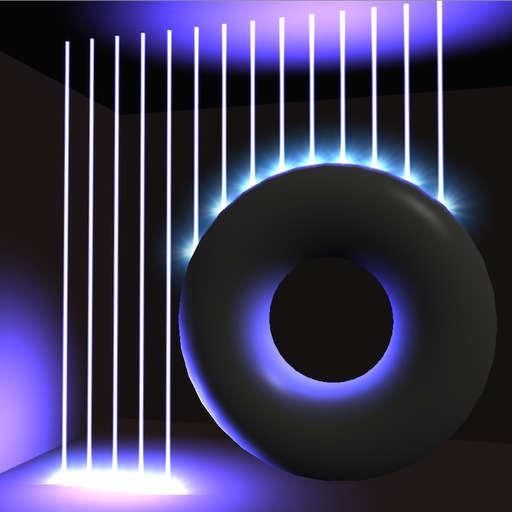
threex.laser is a threex game extension for three.js. It provides a laser beam effect. Excellent to add in your space game!
The laser itself is fully procedural with generated texture.
The bleeding effect is obtained with additive blending.
threex.laser contains a more elaborate laser which dynamically collides with your scene. It is all done for you and it looks great! On impact, there is a point light and an particle sprite for cooler effects :)
examples/lasercooked.html
[view source] :
It shows a usage of threex.lasercooked.js. The laser is inside a cube, the cube is
filled with toruses positioned at random, and the laser is colliding with other objects.
It is a laser beam with dynamic collision.
On impacts, to increase realism, there is sprite and point light.
It depends on THREEx.LaserBeam so first create it and add it to the scene
Then you create the laserCooked based on it. Don’t forget to update it in your render loop.
12345
varlaserCooked=newTHREEx.LaserCooked(laserBeam)onRenderFcts.push(function(delta,now){// every time you render the scene, update laserCookedlaserCooked.update(delta,now)})
This is post is part of the ‘one threex a day’ challenge.
This challenge is to publish every day one game extension for three.js!
One per day, every day and that for 2month!
In this post, we gonna talk aboutthreex.videotexture.
threex.videotexture is a threex game extension for three.js.
It provides help to handle videos in texture.
It is possible to put html5 <video> output in texture with threex.videotexture.js.
You can even put the webcam in a texture with threex.webcamtexture.js.
It is cool if you want to make a tv screen in your game, You can easily use this extension. You pick the video to play and you are ready to go.
The screen surface will use your video texture making it look like a TV set.
If you need it, you can try threex.audiovideotexture.js where the
video is mapped on the texture and additionnally the sound of the video
is handled viaweb audio API.
Thus you can have localized sound, which is neat in the 3d environment.
Here is a videotexture example and its source.
It read the video from a file via video dom element and display it in a texture
Here is a audio/video texture example with WebAudio APIand its source.
It shows how to plug the video sound into the WebAudio API because you get localised sounds.
This is particularly useful in 3D.“Audio/Video” texture is a texture where the sound comes from the object3d on which
the texture is mapped.
Here is another webcam example and its source.
It reads the webcam thru getUserMedia and put it in a texture.
// create the videoTexturevarvideoTexture=newTHREEx.VideoTexture('videos/sintel.ogv')updateFcts.push(function(delta,now){// to update the texture are every framevideoTexture.update(delta,now)})
Then you use it in a mesh like this.
1234567
// use the texture in a THREE.Meshvargeometry=newTHREE.CubeGeometry(1,1,1);varmaterial=newTHREE.MeshBasicMaterial({map:videoTexture.texture});varmesh=newTHREE.Mesh(geometry,material);scene.add(mesh);
Here is the detailled API:
videoTexture.video: the video dom element from which the video is used
videoTexture.texture: the generated THREE.Texture
videoTexture.update(delta, now): update the texture from the video element
videoTexture.destroy(): destroy the object
threex.webcamtexture.js
It will read the webcam usinggetUserMedia.
The browser
will likely ask for permissions to the users.
Let’s see how to use it. You instanciate the texture itself.
12345
varwebcamTexture=newTHREEx.WebcamTexture()updateFcts.push(function(delta,now){// to update the texture are every framewebcamTexture.update(delta,now)})
Then you use it in a mesh
1234567
// use the texture in a THREE.Meshvargeometry=newTHREE.CubeGeometry(1,1,1);varmaterial=newTHREE.MeshBasicMaterial({map:videoTexture.texture});varmesh=newTHREE.Mesh(geometry,material);scene.add(mesh);
Here is the detailled API:
videoTexture.video: the video dom element from which the video is used
videoTexture.texture: the generated THREE.Texture
videoTexture.update(delta, now): update the texture from the video element
videoTexture.destroy(): destroy the object
THREEx.WebcamTexture.available: true if getUserMedia is available on this
browser, false otherwise.
This is post is part of the ‘one threex a day’ challenge.
This challenge is to publish every day one game extension for three.js!
One per day, every day and that for 2month!
In this post, we gonna talk aboutthreex.dynamictexture.
threex.dynamictexture is a threex game extension for three.js. It provides an easy way to handle dynamically generated texture.
Inspiration came from
the excelent babylon.js
which gotBABYLON.DynamicTexture.
It is mainly used to write text in texture. Say you got a character which says something, you may want to put that in a texture and display that above your character. threex.dynamictexture will make it easy for you.
This is post is part of the ‘one threex a day’ challenge.
This challenge is to publish every day one game extension for three.js!
One per day, every day and that for 2month!
In this post, we gonna talk aboutthreex.basiclighting.
threex.basiclighting is a threex game extension for three.js. It provides
a three point lighting.
It is the lighting used in movies:
A key light on the front-left, a back light in the back and a fill light on the front right, nothing fancy.
It is perfect if you dunno much about lighting and you want to add lights in your games.
Nothing big or special in this extension.
This is mainly for educational purposes or for starting your project fast.
This is post is part of the ‘one threex a day’ challenge.
This challenge is to publish every day one game extension for three.js!
One per day, every day and that for 2month!
In this post, we gonna talk aboutthreex.md2character.
threex.md2character is athree.js game extension
which provides a model of a monster.
His name is ‘ratmahatta’ and is from quake era.
It is animated, can hold a weapon, skin may be changed. Pretty sweet.
you got 12 weapons to choose from, 5 different skins and 16 distinct animations. Pretty complete!
It is easy to include in your game, maybe in a cave or a dungeon :)
It is fromwebgl_morphtargets_md2.html three.js example.
The model is make byBrian Collins and converted by@oosmoxiecode’sMD2 converter.
var ratamahatta= new THREEx.MD2CharacterRatmahatta()scene.add(ratamahatta.character.object3d)
Don’t forget to update it when you render with ratamahatta.update(delta).Internally, it create a character and a controls. You can use them directly.
* ratamahatta.character instance of THREEx.MD2Character
* ratamahatta.controls instance of THREEx.MD2CharacterControls
It has simple functions to set the skin, weapon and animations.
ratamahatta.skinNames is the names of available skins. It has 5 different skins ["ratamahatta", "ctf_b", "ctf_r", "dead", "gearwhore"]
ratamahatta.setSkinName(skinName) set the skin based on its name
ratamahatta.weaponsNames is the names of available weapons. It has 12 animation ["none", "weapon", "w_bfg", "w_blaster", "w_chaingun", "w_glauncher", "w_hyperblaster", "w_machinegun", "w_railgun", "w_rlauncher", "w_shotgun", "w_sshotgun"]
ratamahatta.setWeaponName(weaponName) set the weapon based on its name
ratamahatta.animationNames is the names of available animation. It has 16 animations ["stand", "run", "attack", "pain", "jump", "flip", "salute", "taunt", "wave", "point", "crstand", "crwalk", "crattack", "crpain", "crdeath", "death"]
ratamahatta.setAnimationName(animationName) set the animation based on its name
threex.md2charactercontrols.js
First you create controls for your character like this
1
var controls= new THREEx.MD2CharacterControls(character.object3d)
Dont forget to update it when you render with controls.update(delta, now). The character is controlled by controls.inputs properties. You just have to set them to fit your need.
control.inputs.right is true if the character must go right
control.inputs.left is true if the character must go left
control.inputs.up is true if the character must go forward
control.inputs.down is true if the character must go backward
Dont forget to update it at every frame with a character.update(delta)
character.object3d is the THREE.Object3D container
character.setWireframe(boolean) set the model in wireframe.
character.setWeapon(weaponIndex) add a weapon in the character hand. weaponIndex is between 0 and 11. if -1, it removes the weapon.
character.setSkin(skinIndex) set the skin of the character. skinIndex is between 0 and 4
character.setAnimation(animationName) set the animation for the character. The name is one of ["stand", "run", "attack", "pain", "jump", "flip", "salute", "taunt", "wave", "point", "crstand", "crwalk", "crattack", "crpain", "crdeath", "death"].
character.setPlaybackRate(rate) set the playback rate of the animation.
character.load(config) loads the characters
character.addEventListener('loaded', function(){}) to be notified when the model is loaded
character.isLoaded() is true if the model is loaded, false otherwise
 As usual we did a plugin fortQuery API
to make it easy to use in our environement.
One can find 2 examples for it:
A educational example
where your heads controls a box in 3d.
For best result, make sure your face is well and evenly lighted
As usual we did a plugin fortQuery API
to make it easy to use in our environement.
One can find 2 examples for it:
A educational example
where your heads controls a box in 3d.
For best result, make sure your face is well and evenly lighted Another demo
where the camera follows your head.
The whole scene moves as you move your head, providing quite an immersive experience.
You can play with it thru jsfiddle too.
Another demo
where the camera follows your head.
The whole scene moves as you move your head, providing quite an immersive experience.
You can play with it thru jsfiddle too. If you wish enable the debugView, aka the little visualisation the headtracker result.
It gives feedback to the user on what is happening.
Thus the user can move his head accordingly or to change lighting of the room.
If you wish enable the debugView, aka the little visualisation the headtracker result.
It gives feedback to the user on what is happening.
Thus the user can move his head accordingly or to change lighting of the room.